

T
|
his is the yearly planner you’ve been waiting for. A planner that tracks your mood and lifestyle habits, monitors your reading, keeps your appointments organised, cements your goals in place, and includes a touch of your own personality … does it even exist?!
Yes, it does! And it’s been delicately designed by my younger sister – crafted with care, fashioned with flair!
“I like this planner because it allows me to be versatile and flexible in my planning. … This allows me to track my habits, how much I’m studying – things I can’t just put in a normal diary.”
– My Sister (planner creator)
This planner doesn’t just meld smoothly with your lifestyle; in fact, it IMPROVES your lifestyle. It encourages you to put your resolutions to paper, and then monitor your progress on a daily basis.
The planner epitomises the mantra that consistency is key – because taking small steps every day is the most fruitful way to work towards your goals.
Sounds like exactly what we need, doesn’t it?
“You can fit it to your own needs, you can track your own personal habits. It’s not just To-Do’s; it can be more of a tracker which you can’t really get in a non-personalised planner.”
– My sister
What’s great about a DIY planner is that you’re able to fully involve yourself in the creative process on your path to self-improvement. You have the power to contribute your originality to the creation of your wellness journey this year.

With a new planner comes a new beginning. A DIY planner gets you involved with the design of your future from scratch. After all, a self-improvement journey is a do-it-yourself journey, so why not get on board early on?

Follow along with the steps + images below and use the exciting features in the planner as inspiration for your own! Make your planner just as you see it here or add your own personal twist. The best thing is that this planner can be tailor-made to suit you!
The future is truly in your hands!
1. Finding the Notebook

Grids
It’s ideal to have one with gridded pages only because it helps with the various charts my sister uses later on. Personally, I prefer writing on grid books and scrapbooks more so than on conventional lined pages. Who says lined paper is the be-all and end-all?
The other popular option is the dotted notebook, commonly associated with bullet journals.
Sizes
You don’t have to stick to your traditional A4 notepads! My sister chose a B5 book which is neither too big nor too small; it’s the goldilocks size when it comes to planners!
Spiral
A book with a spiral would top it off perfectly! Books with thin spirals facilitate neat writing by allowing your pages to sit flat on your desk.
Where can I get it?
My sister got her notebook from DAISO, which is a great place to pick up a perfect notebook to start your planner.
But of course, any notebook will do!
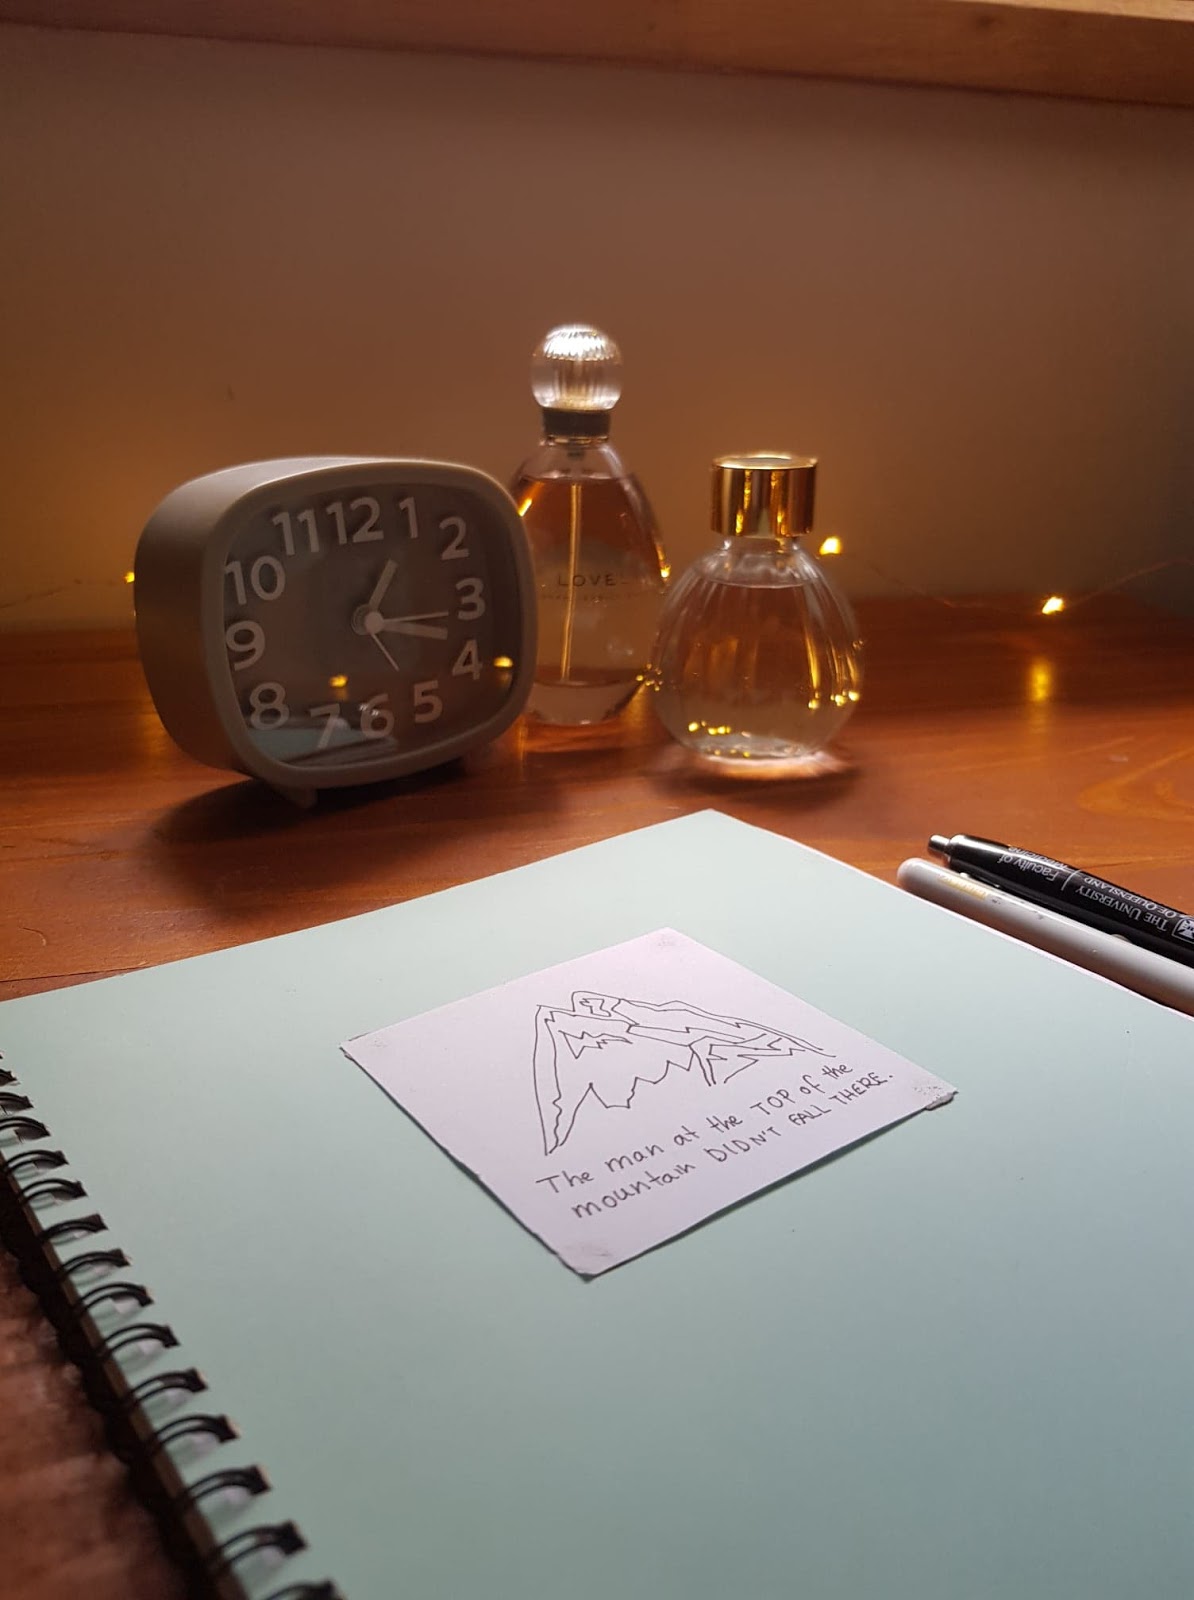
2. The Front Cover

My sister has two symbols of 2019. One is the mountain, representing the uphill journey towards success - when you finally reach the summit.
What is one symbol that inspires you?
3. The Resolutions Page

“I can look back [at my goals] anytime and be reminded of what I need to do to achieve them.” – Sister
Now it’s time to put your 2019 resolutions to paper!
Start with the title of your page. As you can see, my sister has brought back the mountain motif.
Next, write a numbered list of your ‘overarching resolutions + goals’. Below that, for each of the overarching goals, jot down what you need to do to achieve it. This is the first step to internalising your goals for the year ahead and forcing them into action.
4. The Reflections Page

- 2018 Reflections
- Leave in 2018
- Bring in 2019
- Looking forward to in 2019…
- By this time next year…
Remember, you don’t always have to write in paragraphs. You can express your ideas through pictorial images coupled with a short caption. Pictures of graduation hats, balloons, books, musical instruments, love hearts… the possibilities are endless!
This is the page where you look back on the year that has been and visualise the year that is to come.
What habits and attitudes do you want to leave behind?
What new mentalities and mindsets do you want to take on in the New Year?
How do you want to GROW this year?
5. The Mood Tracker – A Year in Pixels

In the case of my sister’s mood tracker, one small square on the chart represents a day. All you need to do is designate a few colours to different moods.
For example…
Green: motivated, productive, accomplished
Yellow: happy, content, grateful
Blue: sad, lethargic, disappointed
Purple: anxious, stressed, fearful
Red: angry, frustrated, annoyed
Then, make a chart as shown with months for columns and days of the month for rows.
True, you may ride a rollercoaster of emotions in one day! But my sister recommends colouring the box with the mood you’re in when you’re just about to go to bed.
I think it’s clever how she’s called it a ‘Year in Pixels’ – at the end of the year, you’ll have a pixelated chart (well, unless it’s monochrome but that’s unlikely!).
6. The Period Tracker

7. The Reading Page

For this page, my sister has opted for a vertical halfway split with two columns titled…
- Books To Read
- Books I’ve Read
The Books I’ve Read section is actually a tracker for your reading progress!
The weeks of the year are listed as rows down the middle of the page. Along the top are the headings,
- Title
- Dates – when you started and finished the book
- Rating
Don’t forget the section where the pixelated colouring happens! If it takes you 5 weeks to read a book, then you’ll pick a colour for that book and highlight 5 squares down along the side – one for each week.
The little horizontal lines are where my sister has split up the year in school terms and holidays.
8. The January Holidays Page

“The paper plane … flying high to the limits of the sky and beyond.”
– Sister
This page will be the start of each new month and is devoted to putting your short-term goals to paper. Remember, effective goal-setting means fleshing out your goals into smaller, more manageable tasks. You know, stepping stones.
Use the grids on the page to draw checkboxes beside your goals and sub-goals!
On the bottom half of the page, you can include a monthly calendar to keep your appointments and events in one place.
Don’t forget to personalise your page with cute illustrations like my sister has done here! She’s chosen a New Year’s theme with drawings of the omochi (Japanese New Year’s food) and more!


9. The Productivity Tracker

"My favourite [feature] would be my productivity trackers. I have one where I categorise my flute and study. Those are my top two priorities. "
– Sister

Assign different colours to some activities that you want to be more productive with – study, instrument practice, homework – and highlight the duration of the time you spent, undistracted, on these activities during the day. Ideally, you’d want to work towards not spending huge portions of your day lazily and wastefully!
At the end of the day, add up the number of hours you spent on each activity. Say you spend 7 hours studying and 1.5 hours practising your instrument. Then you would put a dot on 8.5 hours in Productivity Tracker 2…

10. The Sleep Tracker

Along the side of the chart, write down the days of the month. Across the top, write down the hours e.g. 9pm to 10am.
When you wake up, highlight the duration of time you were asleep. My sister recommends distinguishing the times which you aim to go to bed and wake up. You’ll see she’s done this with dotted lines down the chart.
Try to be consistent with your bedtime and wake-up time.
11. The Habit Tracker

I really like how my sister’s organised The Habit Tracker. She’s put a string of mini calendars side by side with each one assigned to a particular habit she aims to keep up. All the calendars are for the month of January.
Think of some healthy habits you need to incorporate into your life. Maybe drinking 8 glasses of water, exercise, healthy eating, calling your relatives, not binge-watching, not getting distracted, keeping your room tidy, or smiling!
Say you exercised on the 1st day of the month, then you would highlight or dot the 1st day on your calendar.
If you haven’t noticed already, my sister has applied a blue colour scheme all throughout January. Use whatever colours suit you!
12. The Reading Plan

I love how each day on the calendar has a goal set for how far you want to read up to in the book. I really should do this more often – setting aside time to read a small amount regularly.
13. The Study Planner

This is the calendar where you jot down what academic tasks you want to finish each day. The Study Planner is critical for your time-management and forwards-planning, and warrants its own, full page!
You can:
- write when assessment is due
- write to-do list items each day – read chapter 2, review ‘Infectious Diseases’, 30 mins of assignment etc.
- monitor your study progress in the lead-up to deadlines or exams
- visualise when things are due and pace yourself accordingly
- gain skills in prioritisation and planning ahead!
Then, at the end of the month, evaluate your progress towards your goals outlined at the start of the planner!


My sister's planner is an academic planner so it revolves around school terms and holidays, not months; however, you can organise your planner in whichever way you wish! Simply incorporate these same trackers onto the pages for the next month/term/semester and keep climbing that mountain to success!
“Don’t make it too complicated because then you’re not going to want to fill it out. Make sure that you align it to your own needs.” – Sister
Thank you to my sister for sharing your wonderful designs!
I hope this has inspired you to get organised and value the importance of taking daily steps towards reaching your yearly goals! It certainly has inspired me!

Love, Young and Unheroic
All photos by: Young and Unheroic
All photos by: Young and Unheroic
No comments
Post a Comment